DIY Humidifier: Step-by-Step Guide for a Healthy Home
"We may earn a commission for purchases made using our links. Please see our disclosure to learn more."
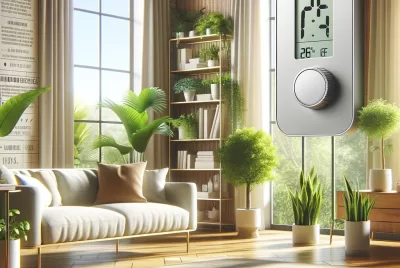
As the weather gets colder, many people turn to humidifiers to keep their homes comfortable and healthy. Humidifiers add moisture to the air, which can help alleviate dry skin, sinus congestion, and other respiratory issues. While there are many humidifiers available on the market, making your own DIY humidifier can be a cost-effective and fun alternative. In this article, we’ll provide a step-by-step guide to creating your own DIY humidifier, including an overview of the benefits of humidifiers, the types of DIY humidifiers, the materials needed, and tips for using and maintaining your DIY humidifier.

Overview of DIY Humidifiers
A. Definition and Benefits of Humidifiers
Humidifiers are devices that add moisture to the air in a room or home. They can be particularly useful during the winter months when dry indoor air can cause discomfort and health issues. Humidifiers can help alleviate dry skin, chapped lips, sinus congestion, and other respiratory issues. They can also reduce the risk of infections by keeping mucous membranes moist and preventing the spread of airborne viruses.
B. Advantages of Making a DIY Humidifier
Making your own DIY humidifier can be a cost-effective and fun alternative to buying one from a store. DIY humidifiers can be made with materials that you already have at home, such as plastic containers, wicks, and fans. Additionally, making your own DIY humidifier gives you the freedom to customize your device to suit your needs and preferences.
DIY Humidifier: Step-by-Step Guide
- DIY humidifiers offer benefits like better air quality and relief from dryness.
- There are three types of DIY humidifiers: wick, evaporative, and ultrasonic.
- To make a DIY humidifier, you’ll need a water container, wick or filter, fan or motor, and humidistat.

Types of DIY Humidifiers
There are several types of DIY humidifiers that you can make at home, each with its own advantages and disadvantages. The three most common types of DIY humidifiers are wick humidifiers, evaporative humidifiers, and ultrasonic humidifiers.
A. Wick Humidifier
A wick humidifier works by drawing water up through a wick or filter and then using a fan or motor to blow air over the wet wick, creating a fine mist. Wick humidifiers are typically easy to make and can be very effective at adding moisture to the air.
To make a wick humidifier, you will need a container with a lid, a wick or filter, a fan or motor, and a humidistat. First, cut a hole in the lid of the container to fit the fan or motor. Then, insert the wick or filter into the container and fill it with water. Place the fan or motor on top of the hole in the lid and connect it to a power source. Finally, attach the humidistat to the fan or motor to control the humidity level.
B. Evaporative Humidifier
An evaporative humidifier works by blowing air over a wet surface, such as a sponge or filter, causing the water to evaporate and add moisture to the air. Evaporative humidifiers are typically easy to make and can be very effective at adding moisture to the air.
To make an evaporative humidifier, you will need a container with a lid, a sponge or filter, a fan or motor, and a humidistat. First, cut a hole in the lid of the container to fit the fan or motor. Then, insert the sponge or filter into the container and fill it with water. Place the fan or motor on top of the hole in the lid and connect it to a power source. Finally, attach the humidistat to the fan or motor to control the humidity level.
C. Ultrasonic Humidifier
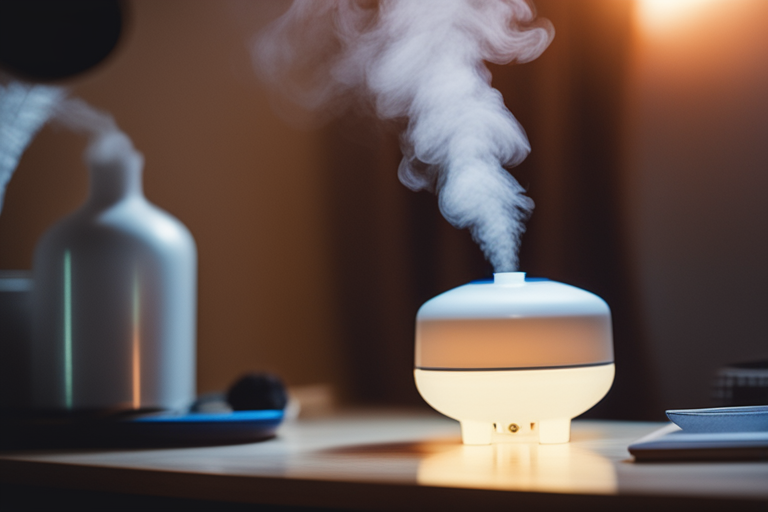
An ultrasonic humidifier works by using high-frequency vibrations to create a fine mist that is released into the air. Ultrasonic humidifiers are typically more difficult to make than wick or evaporative humidifiers, but they can be very effective at adding moisture to the air.
To make an ultrasonic humidifier, you will need a container with a lid, an ultrasonic transducer, a power source, and a humidistat. First, drill a hole in the lid of the container to fit the ultrasonic transducer. Then, connect the ultrasonic transducer to a power source and attach it to the lid of the container. Finally, attach the humidistat to the power source to control the humidity level.

Materials Needed for a DIY Humidifier
The materials needed to make a DIY humidifier will depend on the type of humidifier you choose to make. However, some common materials include a water container, a wick or filter, a fan or motor, and a humidistat.
A. Water Container
The water container is the most important part of the DIY humidifier, as it holds the water that will be used to add moisture to the air. You can use any container that is large enough to hold the amount of water you need and has a lid.
B. Wick or Filter
The wick or filter is used to draw water up from the container and create a fine mist. Wick humidifiers typically use a wick, while evaporative humidifiers can use a sponge or filter.
C. Fan or Motor
The fan or motor is used to blow air over the wet wick or filter, creating a fine mist that is released into the air. The fan or motor should be powerful enough to create a steady flow of air.
D. Humidistat
The humidistat is used to control the humidity level in the room. It should be connected to the fan or motor and set to the desired humidity level.
| Type of Humidifier | Materials Needed |
|---|---|
| Wick Humidifier | Container with lid, wick/filter, fan/motor, humidistat |
| Evaporative Humidifier | Container with lid, sponge/filter, fan/motor, humidistat |
| Ultrasonic Humidifier | Container with lid, ultrasonic transducer, power source, humidistat |

How to Make a DIY Humidifier
A. Step-by-Step Guide for a Wick Humidifier
- Cut a hole in the lid of the container to fit the fan or motor.
- Insert the wick or filter into the container and fill it with water.
- Place the fan or motor on top of the hole in the lid and connect it to a power source.
- Attach the humidistat to the fan or motor to control the humidity level.
B. Step-by-Step Guide for an Evaporative Humidifier
- Cut a hole in the lid of the container to fit the fan or motor.
- Insert the sponge or filter into the container and fill it with water.
- Place the fan or motor on top of the hole in the lid and connect it to a power source.
- Attach the humidistat to the fan or motor to control the humidity level.
C. Step-by-Step Guide for an Ultrasonic Humidifier
- Drill a hole in the lid of the container to fit the ultrasonic transducer.
- Connect the ultrasonic transducer to a power source and attach it to the lid of the container.
- Attach the humidistat to the power source to control the humidity level.

Tips for Using and Maintaining a DIY Humidifier
A. Refilling the Water
To keep your DIY humidifier running smoothly, it’s important to refill the water container regularly. Check the water level daily and refill as needed. Be sure to use clean water to prevent the growth of bacteria and mold.
B. Cleaning the Humidifier
Regular cleaning is essential to prevent the buildup of bacteria and mold in your DIY humidifier. Depending on the type of humidifier you have, you may need to clean the wick or filter, the water container, and the fan or motor. Follow the manufacturer’s instructions for cleaning your humidifier.
C. Preventing Mold and Bacteria Growth
To prevent the growth of mold and bacteria in your DIY humidifier, be sure to use clean water and clean your humidifier regularly. You can also add a few drops of essential oils, such as tea tree oil or eucalyptus oil, to the water to help prevent the growth of bacteria.
Personal Story: Benefits of Using a DIY Humidifier
As a new mother, I was concerned about the dry air in our home affecting my baby’s health. I had heard about the benefits of using a humidifier, but I didn’t want to spend a lot of money on a store-bought one. That’s when I came across the idea of making my own DIY humidifier.
I decided to make an ultrasonic humidifier using a water container, a small ultrasonic mist maker, and a humidistat to monitor the humidity level. The process was easy and affordable, and I was able to customize the size and design to fit my needs.
The benefits of using the DIY humidifier were noticeable right away. My baby’s skin was less dry, and she seemed to sleep better at night. I also noticed that the air in the house felt fresher and cleaner.
Overall, making my own DIY humidifier was a great decision that has helped improve the health and comfort of my family.
Conclusion
A. Summary of Benefits of DIY Humidifiers
DIY humidifiers can be a cost-effective and fun alternative to store-bought humidifiers. They can help alleviate dry skin, sinus congestion, and other respiratory issues, and reduce the risk of infections by keeping mucous membranes moist and preventing the spread of airborne viruses.
B. Key Recommendations
When making your own DIY humidifier, be sure to choose the type and materials that are best suited to your needs and preferences. Follow the step-by-step instructions carefully and use clean water to prevent the growth of bacteria and mold. Regular cleaning and maintenance are also essential to keep your DIY humidifier running smoothly.
C. Call to Action to Try Making a DIY Humidifier
If you’re looking for a cost-effective and fun way to add moisture to the air in your home, try making a DIY humidifier today. With a few simple materials and our step-by-step guide, you can create a healthy and comfortable living space that you’ll love.